Get Started with Generative AI – Creating an Agent
You’re probably excited to start creating an agent with Microsoft Copilot Studio. This first lab, Planning Your First Agent, was written to guide you and your organization in thinking about the problems your agent can solve and where it can be deployed. We understand that you want to get started right away; however, in this section, you’ll learn why it’s important to first understand what can be accomplished with generative AI in Copilot Studio, as this could influence the topics you choose to manually write in the studio’s creation canvas.
Section 1: Sign in to Create an Agent
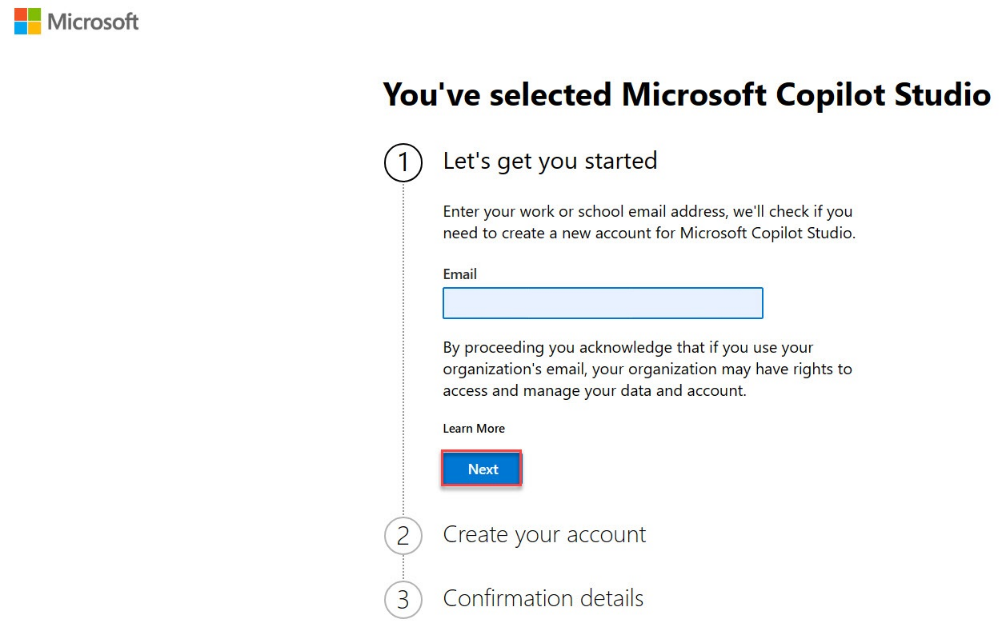
Your first task is to sign in so you can create your agent.
Go to https://copilotstudio.microsoft.com/ and enter the email address you’ll use to create the agent. Sign in with your work, school, or developer account if you’re not working with an instructor.
Note
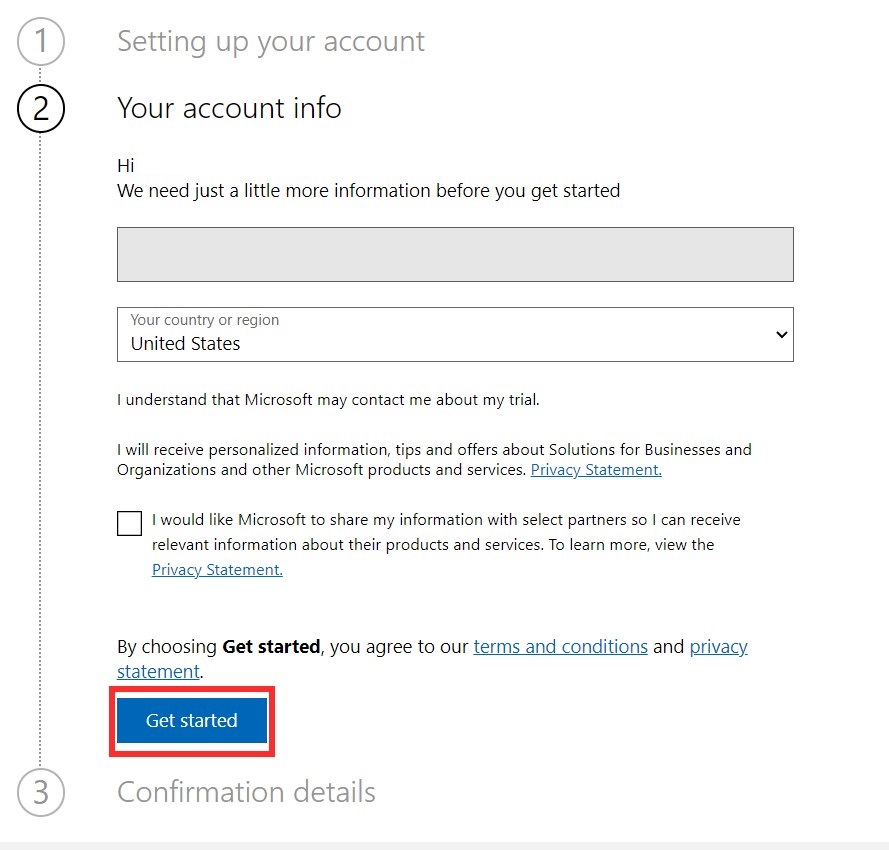
Your account may already be set up. If screens similar to the images below do not appear, you can skip directly to step 7.
- Select Next.
3. Select Start
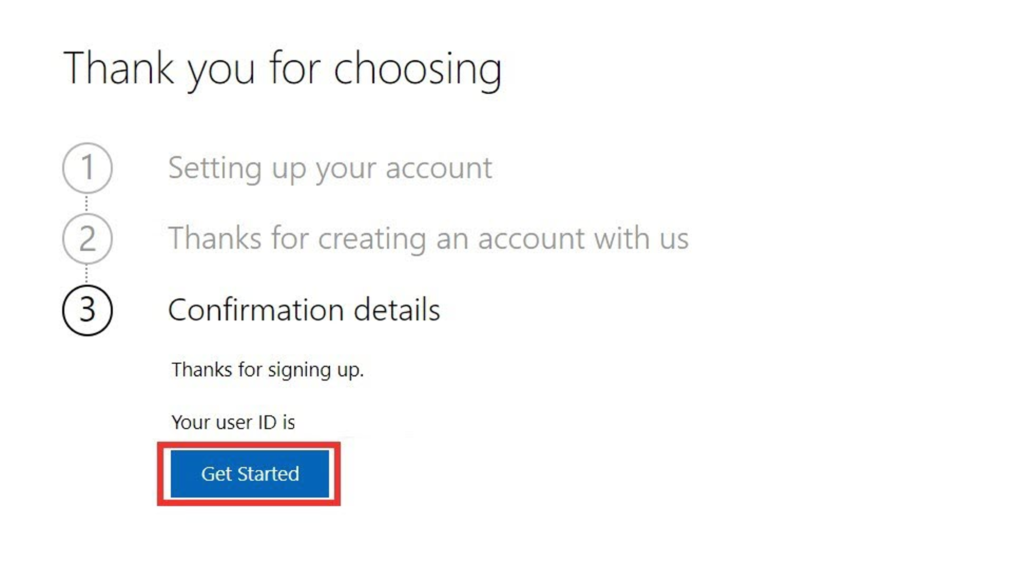
4. Select “Start” under the confirmation details
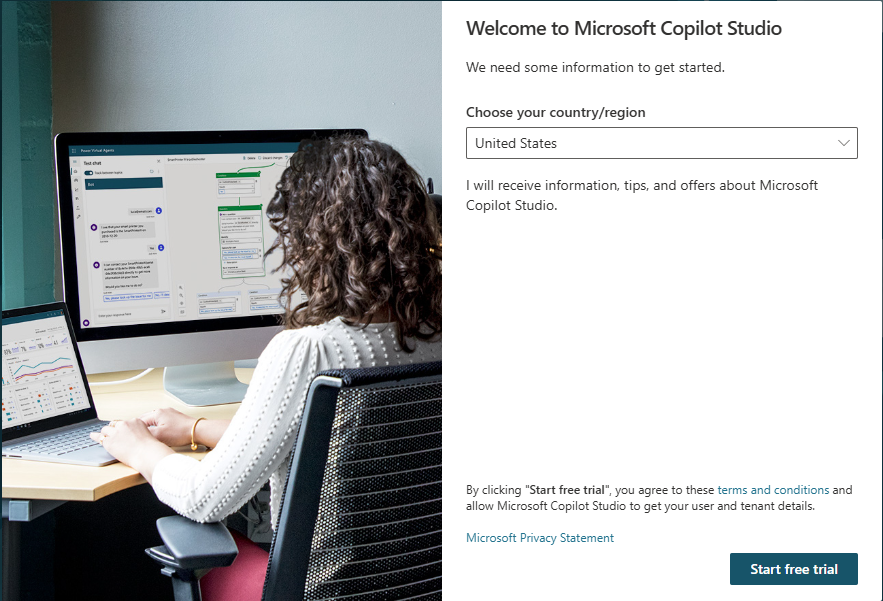
5. Select your country/region, then click “Start free trial”
IMPORTANT
Skip directly here if your account has already been set up.
You should be redirected to copilotstudio.microsoft.com. If not, go to the creation environment URL for Microsoft Copilot Studio: copilotstudio.microsoft.com. An environment selector box is located in the upper right corner. An environment is where your organization stores, manages, and shares the agent, business data, apps, and Microsoft Power Automate flows. You can click the environment selector button to view the agents available in that environment.

If you’re working with an instructor, confirm now with them which environment to use, if that hasn’t already been done.
If you’re not working with an instructor and are using your own environment, for the purposes of this course, you can use the default environment. Otherwise, if your tenant allows it, an administrator can create your own environment to use at admin.powerplatform.com.
For more information, see Manage the default environment.
Section 2: Create an Agent
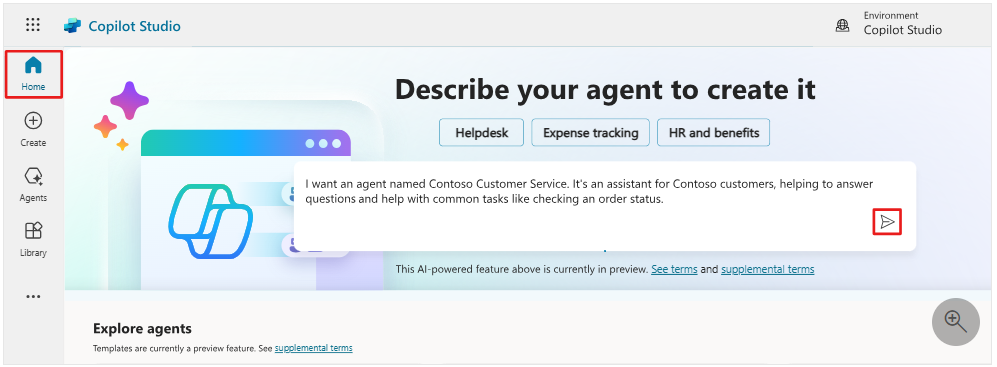
From the Microsoft Copilot Studio homepage, describe your agent to create it. Enter a description like this:
I want an agent named Contoso Customer Service. It’s an assistant for Contoso customers that helps answer questions and perform common tasks like checking the status of an order.
2. You will be redirected to an optional conversational experience to further customize your agent. You can provide more details in the description and also set a tone of voice.
3. Start by adding a tone of voice to the agent. Type the following prompt in the dialog box:
Give the agent a playful, cheerful, customer-focused tone, but firmly professional.
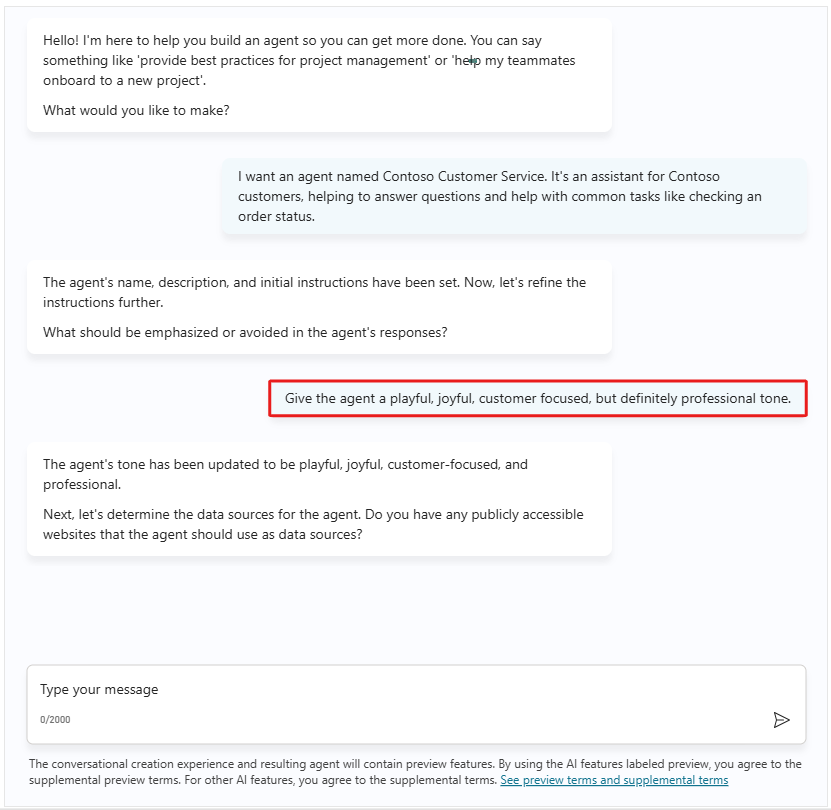
4. Next, you will be asked to provide sources for important information. We will use publicly accessible websites. Type and confirm the following:
The information should come from https://learn.microsoft.com/en-us/microsoft-copilot-studio/ and https://www.microsoft.com/en-us/microsoft-copilot/
5. You will also be asked to specify topics or tasks that the agent should not handle or address. Type and confirm the following:
We do not want to talk about other brands like Fabrikam. Never provide product comparisons with competing technologies.
6. On the right side of the window, you will see a summary pane that displays all the settings and information you have provided to the agent.
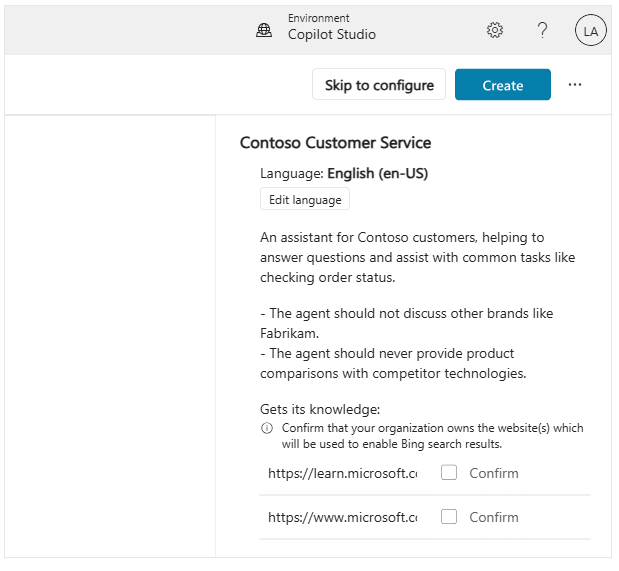
7. Next, above the summary pane, select the ellipsis (…) then click “Edit advanced settings.”
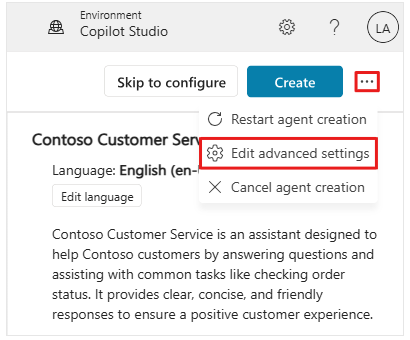
8. In the advanced settings window, change the agent’s default schema name to “ContosoCustomerService.”
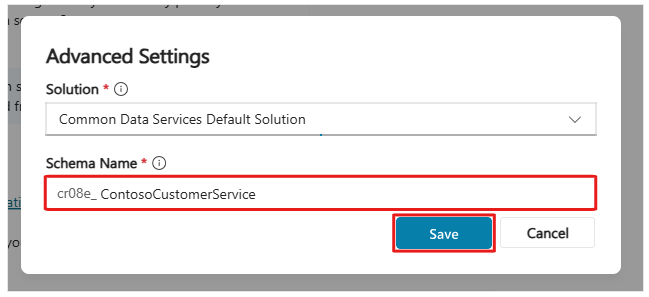
9. Finally, click Create in the upper right corner to finalize your adjustments.
Note
Once you click Create, the process of creating the first agent in a new environment may take up to 15 minutes. Subsequent agents are created much faster.
Note
After the agent is created, a pop-up window may appear to introduce new features in Copilot Studio. To continue, click Next three times, then Finish at the end.
10. After a few minutes, you will be redirected to your agent’s Overview page.
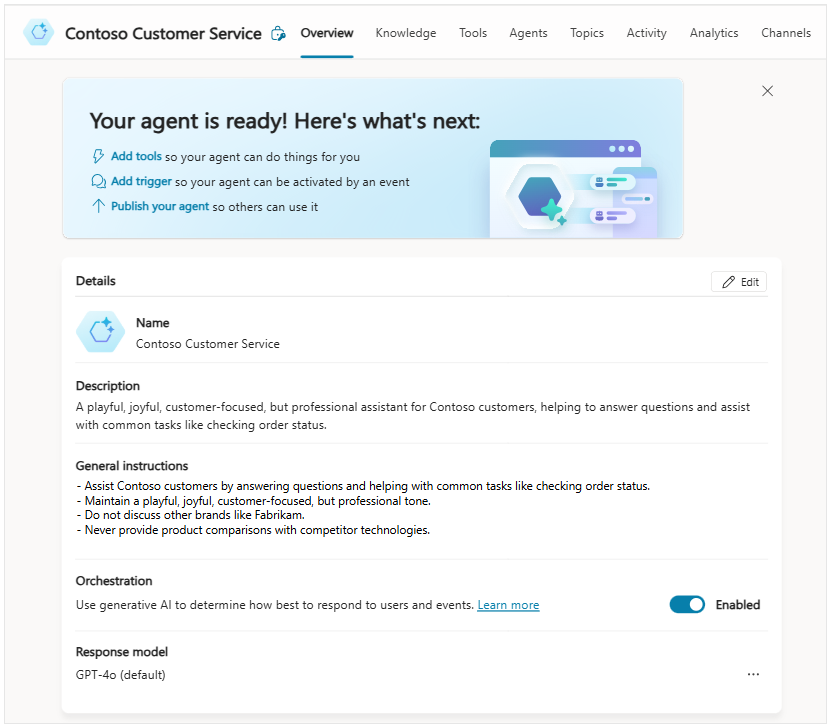
After creating your agent, it appears in the list under the Agents menu in the navigation bar on the left.
💡 Tip
If you’ve already created an agent in this environment, to create another one, select the Agents item in the navigation bar, then click New agent.
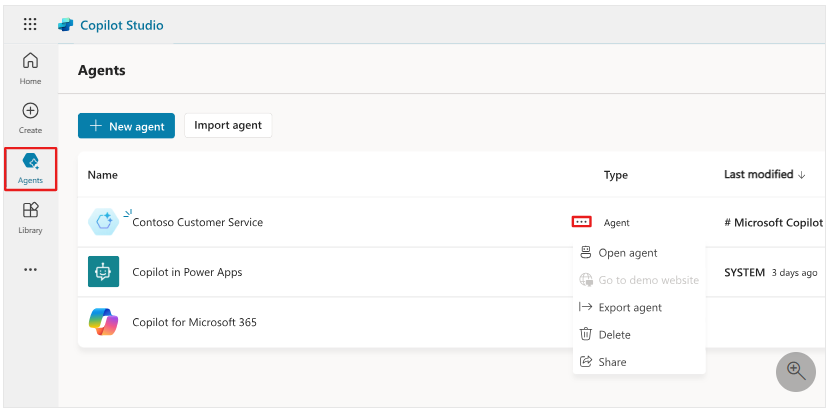
11. In the Agents menu, you can select from the agents that are available to you. By clicking the ellipsis next to an agent, a dropdown menu appears with options such as Open agent, Export agent, and Delete. You can also click the agent’s name, which will open it.
Section 3: Take a Quick Tour of the User Interface
Microsoft Copilot Studio makes it easy to create agents, whether simple or advanced. The next section reviews the main pages of the creation experience in Microsoft Copilot Studio.
Since the Agents area was explained in the previous section, the following section will cover the main options available after selecting an agent.
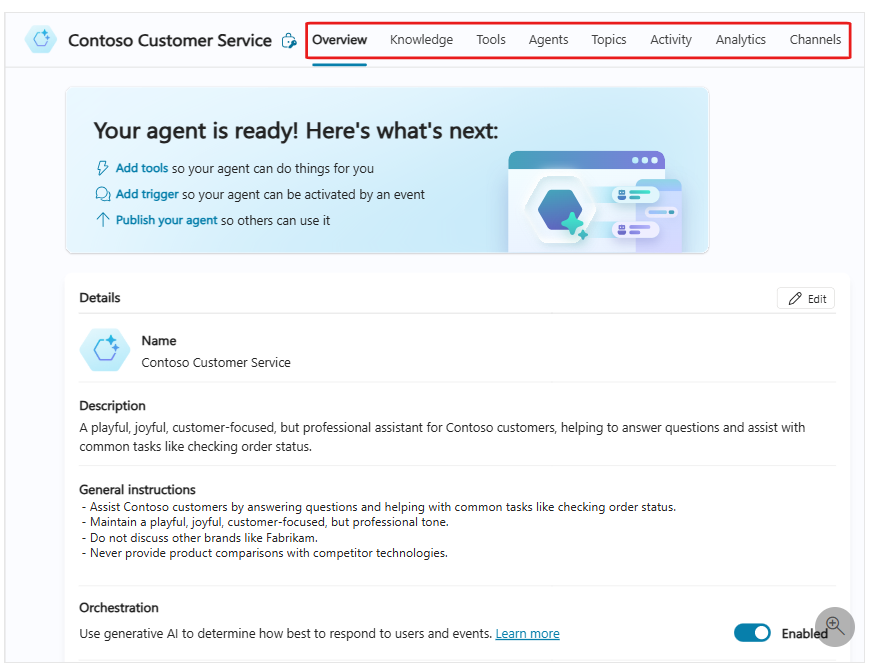
Overview – Displays your homepage, including a summary of the agent’s Details, Knowledge, Topics, Actions, and Publishing Status.
Knowledge – Allows you to provide a knowledge base as reference data for your agent, so it can extract information from the specific data you provide.
Topics – Provides a list of all Topics available for your agent. These topics are conversational paths you develop to determine how your agent responds to specific scenarios.
Tools – Allows you to add Tools that your agent can use. Tools are similar to Power Automate actions, giving your agent access to real tools like updating a Dataverse table or sending an email.
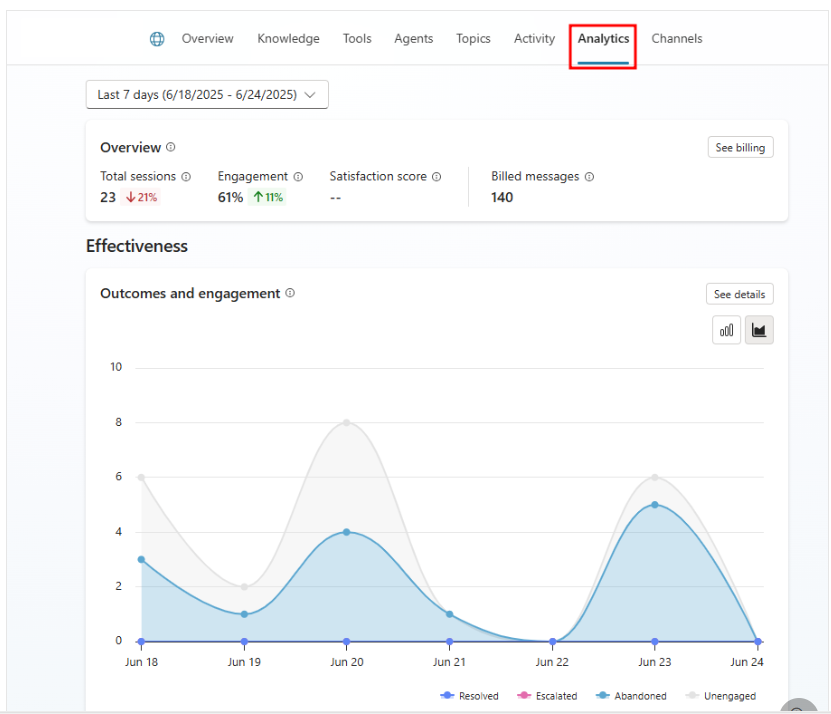
Analytics – Provides visualization metrics to monitor your agent’s performance. The different analytics sections include: Overview, Effectiveness, Usage, and Satisfaction.
Channels – Allows you to publish and connect your agent to various websites, web services, and integrations on your own site.
Section 4: Take a Tour of the Analytics Section
Microsoft Copilot Studio makes it easy to analyze the results of your agent’s sessions with users. To view the analytics of your selected agent, select Analytics from the top navigation bar of your agent’s home page.
When you first explore the Analytics section, you’ll be taken to a summary page. This page displays key performance indicators (KPIs) from your agent’s session logs. These KPIs are split into different sections that provide a snapshot of indicator domains. The different sections include:
Unengaged – A session starts when a user interacts with your agent or the agent sends a proactive message to the user. The session begins in an unengaged state.
Overview – Key data and trends for the agent. The KPIs in this section include:
Total sessions – A session starts when a conversation starts, and each time the user changes the subject. The total includes engaged and unengaged sessions.
Engagement – The percentage of sessions where the user replied to your agent at least once. High engagement is good news.
Satisfaction score – The satisfaction score is based on user survey responses.
Billed messages – The number of messages during the selected period that you’ll be billed for. It takes a while for this data to update, so this number might not reflect all billed messages.
Effectiveness – Effectiveness of the agent in solving user issues. This section includes an outcomes and engagement chart that displays how many users chatted with your agent, and whether it was able to answer their questions. The outcomes and engagement chart displays the following tracked outcomes:
Resolved – A session ends and is considered resolved when the End of Conversation topic is triggered and the user confirms that the interaction was a success or lets the session time out.
Escalated – A session ends and is considered escalated when the Escalate topic is triggered or a Transfer to agent node is run (the current analytics session ends, whether the conversation transfers to a live agent or not).
Abandoned – A session ends and is considered abandoned when an engaged session times out after 36 minutes and didn’t reach a resolved or escalated state.
Note
The following screenshots display the analytics data from a sample agent. When you first create an agent, there’s no session history to pull data from. To review analytics for your agent, you’ll need to first publish the agent to a channel, and have end-users interact with it.
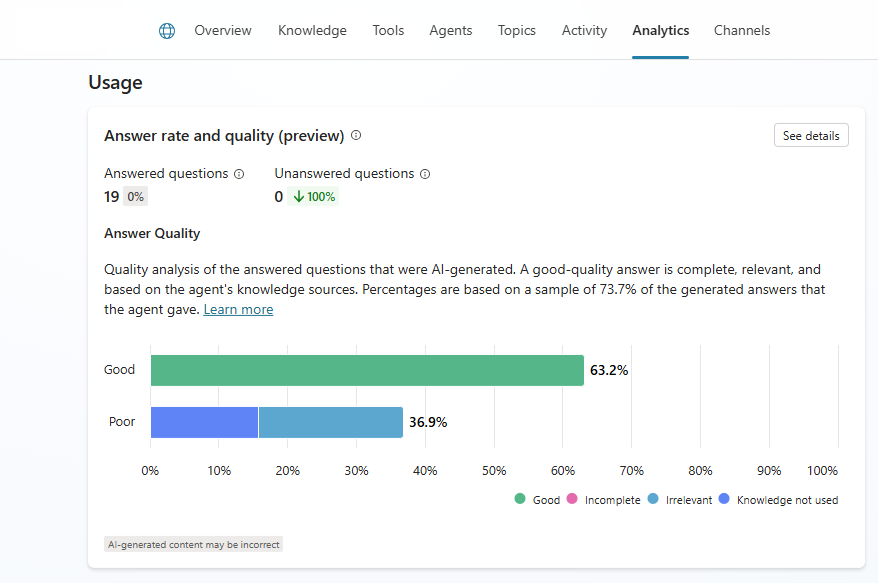
Usage – Agent usage and answer quality. This section includes the following KPIs:
- Answered questions – Total number of questions that were answered by your agent.
- Unanswered questions – Total number of questions that weren’t answered by your agent.
- Answer rate and quality – Your agent’s performance in answering user questions. This includes the percentage of questions answered and the quality of AI-generated answers. The answer quality chart is split between two answer quality indicators: Good and Poor.
- Good – A good answer quality indicates the answer is complete, relevant, and based on the agent’s knowledge sources.
- Poor – A poor answer quality indicates the answer was incomplete, irrelevant, or an available knowledge source wasn’t used to answer the user’s query.
- Satisfaction – Customer satisfaction with the agent. This section includes two tracked subsections:
- Reactions – Users can react to agent messages. The tally of positive and negative reactions appears here.
- Survey results – The satisfaction score is based on user surveys.
Section 5: Take a tour of Settings
The settings panel, which you can navigate to by selecting the Settings button in the top-right of Copilot Studio, contains all the settings available to an agent. Settings allowing you to quickly make security changes, add skills, or set the agent’s orchestration mode.
- Generative AI – Where you can configure the orchestration mode of your agent and advanced Generative AI features like deep reasoning, multi-agent orchestration, response models, moderation settings, knowledge grounding, file processing, and tenant graph grounding.
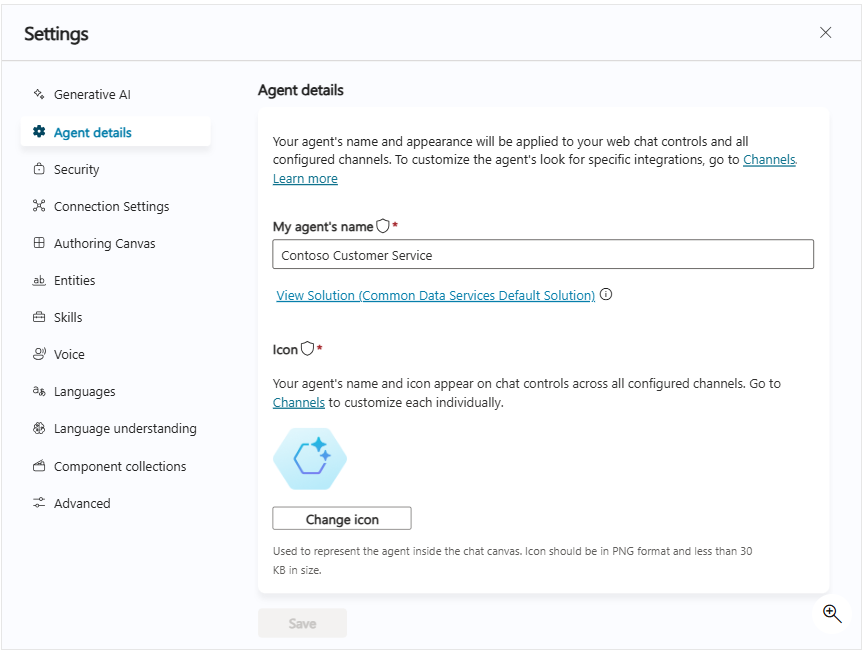
- Agent details – Where you can update the agent display name, icon, and view its attached solution.
- Security – Where you can share your agent with other users (to coauthor it) or with security groups (to use it). This is also where you configure end-user authentication settings (the type of authentication and whether it’s enforced or not), and web channel security that allows you to further secure the Direct Line channel that is used for any web or custom application deployment.
- Entities – Copilot Studio comes with many prebuilt entities to help identify key information in a user utterance (e.g. a city, date, number, etc.). This menu is also where you can define your own closed-list entities or regular expression entities.
- Skills – Where you can extend your agent using skills. If you have already built and deployed bots in your organization (using pro-code tools, including the Microsoft 365 Agents SDK) for specific scenarios, you can convert such a bot to a skill and embed the skill within a Microsoft Copilot Studio agent.
- Languages – Where you can configure additional languages your agent can be used in and localized into.
- Language understanding – Where you can configure custom language models developed and trained on Azure AI Language, in Azure Conversational Language Understanding (CLU). When configured, this effectively replaces the out-of-the-box natural language understanding model (NLU) for intent detection, and can also replace entity detection and extraction.
