Implement Azure File Sync
You can implement Azure File Sync manually or by using Windows Admin Center. When you use Windows Admin Center, you only need to provide basic configuration settings because this method meets all prerequisites. For manual deployment, you use either the Azure portal or Azure PowerShell. However, for manual deployment, you must already have an Azure Storage account with an Azure file share that will serve as the cloud endpoint. In both cases, you need local Windows file servers that you want to use as server endpoints.
In this unit, you will learn how to implement Azure File Sync using both methods.
Implement Azure File Sync manually
To implement Azure File Sync manually, you must follow these general steps:
- Deploy the Storage Sync Service
- Install the Azure File Sync agent
- Register the Windows Server with the Storage Sync Service
- Create a sync group
- Add server endpoints
1. Deploy the Storage Sync Service
The Storage Sync Service is the top-level Azure resource for File Sync. You can have multiple instances of the Storage Sync Service, but a Windows Server can only register with one Storage Sync Service. Servers registered with different instances cannot synchronize with each other. The Storage Sync Service can only be used with Azure file shares located in the same Azure region.
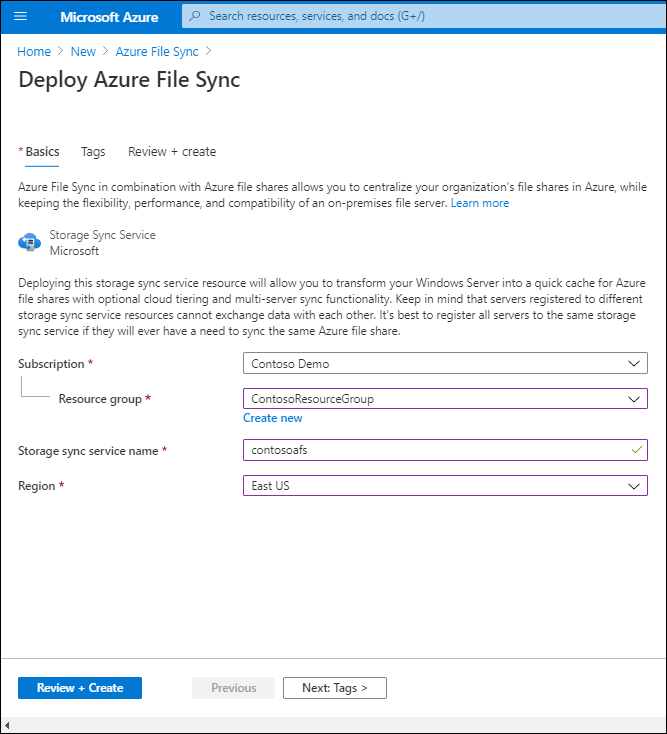
You deploy the Storage Sync Service in the Azure portal by selecting Create a resource, searching for Azure File Sync, and then selecting Create.
Enter a resource group name, a storage sync service name, a region, then select Review + Create.
Note
You can deploy the Storage Sync Service with Azure PowerShell by using the command New-AzStorageSyncService.
2. Install the Azure File Sync agent
You can download the File Sync agent installation package from the Azure portal or the Microsoft Download Center.
You must install the agent on all servers that will be used as server endpoints.
If you want to use File Sync with a failover cluster, you must install the agent on each node of the cluster.
By default, the installed agent attempts to update automatically within 21 days after the published expiration date. It begins trying to update once per week during this 21-day period and during the selected maintenance window.
3. Register the Windows Server with the Storage Sync Service
Once the File Sync agent installation is complete, the server registration window opens automatically.
Registering the Windows Server with the Storage Sync Service establishes a trust relationship between your server (or cluster) and the Storage Sync Service.
After signing in with your Azure credentials, registration requires information about your Azure subscription, resource group, and the Storage Sync Service you created in step 1.
💡 Tip
You can only register a server (or cluster) with one Storage Sync Service at a time.
You can register an Azure File Sync agent by running the PowerShell command Register-AzStorageSyncServer.
This command must be executed locally on the Windows Server computer you want to register.
If you want to register a Server Core, you will need a second computer with Desktop Experience to complete the device sign-in.
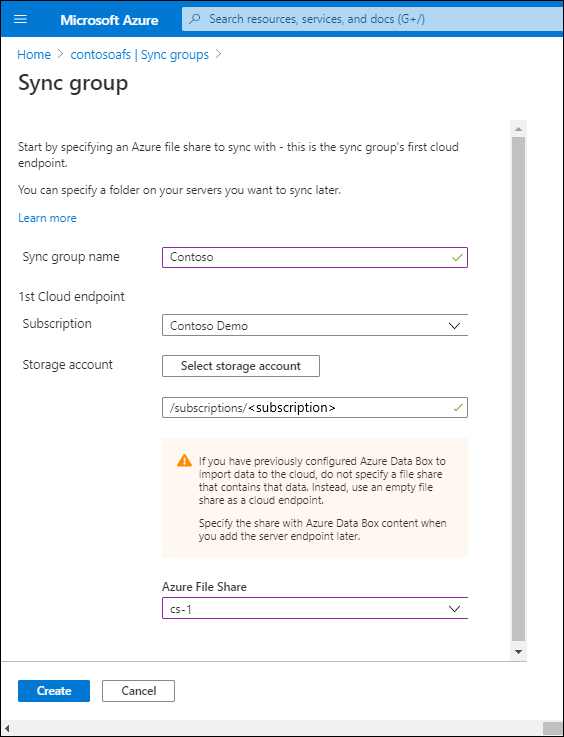
4. Create a sync group
A sync group contains the endpoints you want to keep synchronized with each other. It effectively defines the synchronization topology.
A sync group must always contain one cloud endpoint and can contain up to 50 server endpoints.
Server endpoints in the same group must come from different registered servers.
All server endpoints synchronize with the cloud endpoint, which acts as the hub.
You can make changes on a cloud or server endpoint because File Sync uses multi-master replication.
If you modify a server endpoint, the change is immediately detected, synchronized with the cloud endpoint, and then with the other server endpoints.
But if you modify the cloud endpoint directly, the change must first be detected by a change detection job.
This detection job runs only once every 24 hours for a cloud endpoint.
You create a sync group in the Azure portal by selecting + Sync group in the Storage Sync Service pane.
Note
You can create a sync group with Azure PowerShell by using the command New-AzStorageSyncGroup.
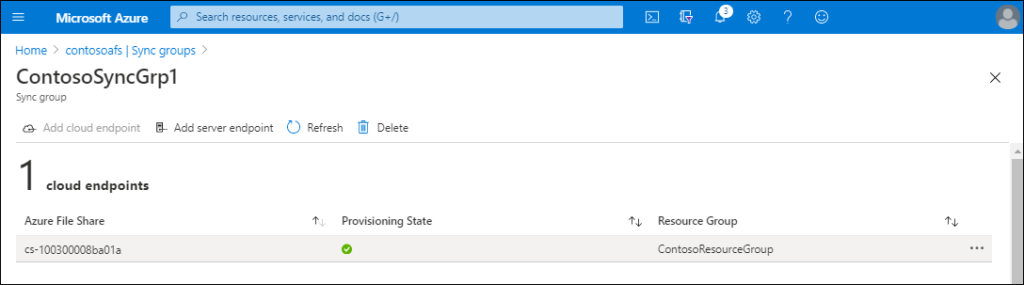
5. Add server endpoints
Server endpoints represent a specific location on a registered Windows Server computer, such as a folder or volume, that you want to synchronize with an Azure file share (cloud endpoint in the same sync group).
You can only synchronize files located on volumes formatted with NTFS, as the ReFS file system and other file systems are not supported.
You can add multiple server endpoints for the same registered server in different sync groups, but their paths must not overlap.
You can only add one server endpoint per registered server and per sync group.
When adding a server endpoint, you can also configure cloud tiering and offline data transfer.
With offline data transfer, you can use alternative methods, such as Azure Data Box, to move large amounts of files to Azure.
Cloud tiering turns a server endpoint into a cache of files on an Azure file share.
However, note that cloud tiering is only supported on data volumes; it is not supported on the system volume.
You add a server endpoint in the Azure portal by selecting Add server endpoint in the sync group pane.
Note
You can add a server endpoint with Azure PowerShell by using the command New-AzStorageSyncServerEndpoint.
Implement Azure File Sync with Windows Admin Center
Windows Admin Center simplifies the deployment of File Sync. It can automatically create all prerequisites (Storage Sync Service, storage account, and Azure file share) if needed, or use those that already exist in the Azure subscription.
All you need are your Azure subscription credentials and a Windows Server machine that you want to use as a server endpoint.
Note
To configure File Sync, you must register Windows Admin Center with Azure.
After connecting Windows Admin Center to the appropriate Windows Server machine, in Windows Admin Center, you need to select Azure File Sync, then Configure.
Windows Admin Center detects whether the File Sync prerequisites already exist in the subscription or if it needs to create them.
Once the prerequisites are in place, you can modify them, then select Configure.
The configuration downloads and installs the Azure File Sync agent and registers Windows Server in the sync group.
The final step is to select Sync a folder, where you can specify the local folder you want to add as a server endpoint, as well as the sync group it should be associated with.
💡 Tip
You can add a Windows Server as a server endpoint to a sync group and enable cloud tiering via Windows Admin Center.
However, you must still use the Azure portal to configure other settings, such as the cloud tiering date policy.
