Exercise – Get the sample application
Choose your training module development environment
- Local development environment using a microsoft-hosted agent
- Github Codespaces development environment using a self-hosted agent
Get ready to start building a CI pipeline with Microsoft Azure Pipelines. The first step is to build and run the Space Game web app. Understanding how to build software manually, prepares you to repeat the process in the pipeline.
Mara is going to do exactly that, and by following the procedures, you can do the same thing.
Create an Azure DevOps personal access token
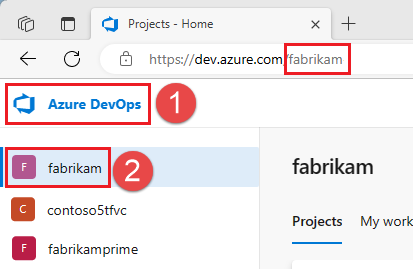
- Sign in to your organization (
https://dev.azure.com/{yourorganization}). If you don’t already have an Azure DevOps organization, create a free organization before you begin. After you sign in, if you have more than one organization, choose Azure DevOps and go to the organization that you plan to use to complete this module. In this example, the name of the organization isfabrikam.
- From your home page, open user settings
 and select Personal access tokens.
 - Select + New Token.
- Name your token using any name that you prefer. The token is used when the Codespace registers its agent with your Azure DevOps organization, so you can keep the default expiration.
- Choose Custom defined and choose Show all scopes.
 and select Personal access tokens.
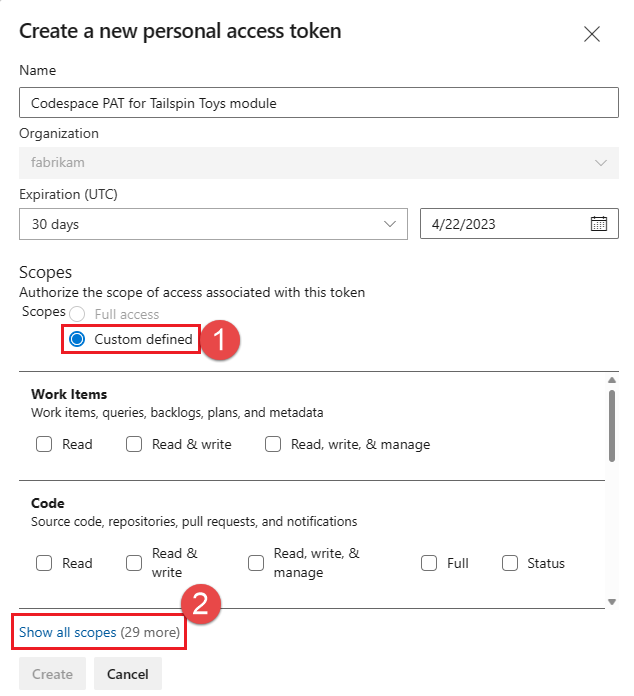
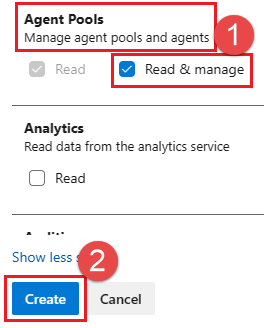
Select the following scope: Agent Pools (Read & manage), and choose Create.
When you’re done, copy the token and store it in a secure location. For your security, it won’t be shown again.
Warning!!
Treat and use a PAT like your password and keep it secret.
Create a fork
The first step to using a project in Git is to create a fork so you can work with and modify the source files. A fork is a copy of a GitHub repository. The copy exists in your account and lets you make any changes you want without affecting the original project.
Although you can propose changes to the original project, in this lesson, you work with the Space Game web project as though it was the original project owned by Mara and the team.
Note
If you have previously forked this repository, for example if you have previously completed this module or another Tailspin Toys training module, we recommend that you delete your fork and create a new fork using the following steps. If you don’t want to delete your fork, ensure that you sync your fork.
Let’s fork the Space Game web project into your GitHub account:
- In a web browser, go to GitHub and sign in.
- Go to the Space Game web project.
- Select Fork:

- To fork the repository into your account, follow the instructions.
Set up secrets for self-hosted agent
Before you create your Codespace, you create several secrets that help your self-hosted Azure DevOps agent run. In production, you wouldn’t want to use a self-hosted agent in GitHub Codespaces. However, because your team is using Codespaces for testing, it’s a good temporary solution to use it when you’re building your pipelines.
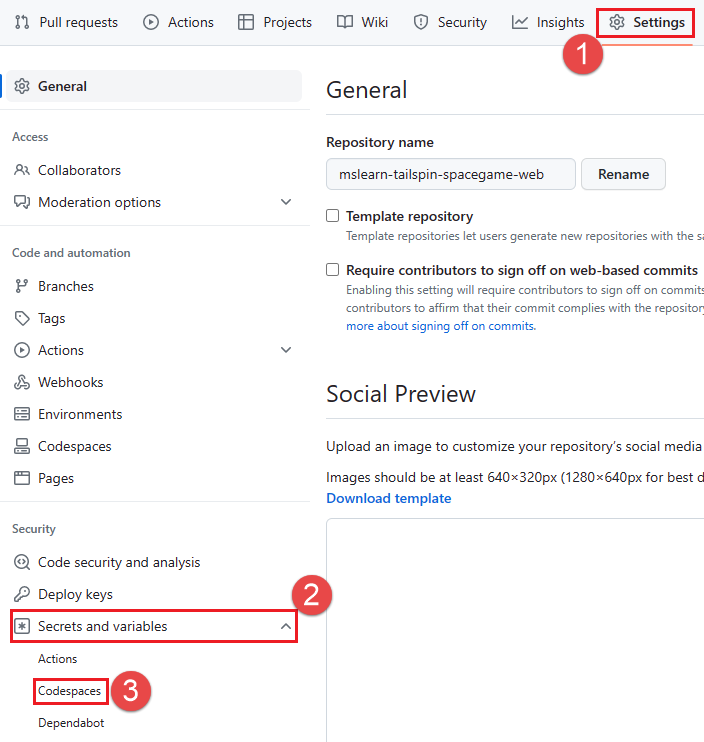
- Go to your forked GitHub repository and select Settings > Secrets and variables > Codespaces.
Create the following Codespaces Repository secrets.
| Name | Value |
|---|---|
| ADO_ORG | Name of the Azure DevOps organization you’re using to complete this module. In this example, fabrikam is the name of the organization. This organization name must be the same one you used when you created your PAT in the previous step. |
| ADO_PAT | The Personal Access Token that you created in the previous step. |
tip
In this training module, your agent is assigned to the Default agent pool. If don’t want to run your agent in the Default pool (for example, you’re running this training module using your production Azure DevOps environment and you have other agents in the Default pool), you can create a secret named ADO_POOL_NAME and specify the name of the agent pool to use. If this secret isn’t specified, the Default pool is used.
Set up Codespaces
Next, you set up Codespaces so that you can build the website, work with source files, and run your pipeline using a self-hosted agent.
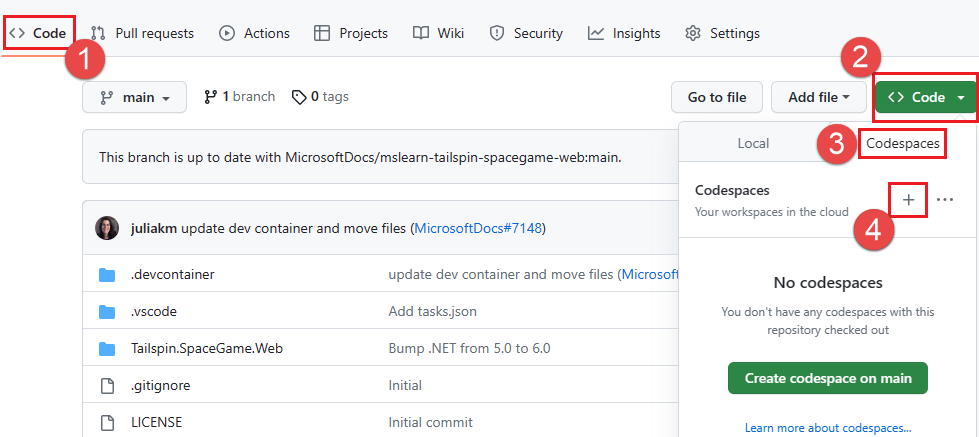
- In your forked GitHub repository, select Code, select Code again, choose the Codespaces tab, and choose + to create a new Codespace.
- Wait for your Codespace to build. This build can take a few moments, but you only have to do it once in this step of the training module.When the build completes, you’re redirected to an online version of Visual Studio Code. Your Codespace comes with a fresh installation of Visual Studio Code, similar to a fresh installation of Visual Studio Code on your local machine. When the Codespace first starts, Visual Studio Code online might prompt you to provide certain configurations or ask you about preferences. You can choose the preferences that suit your Visual Studio Code usage style.
Set the upstream remote
A remote is a Git repository where team members collaborate (similar to a repository on GitHub). Let’s list your remotes and add a remote that points to Microsoft’s copy of the repository so you can get the latest sample code.
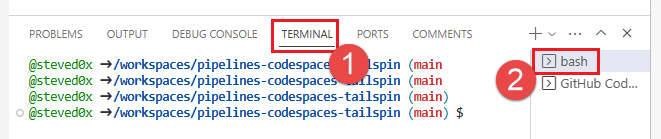
- In the Visual Studio Code online editor, go to the terminal window and choose bash from the right-hand side.
2. To list your remotes, run the git remote command:
git remote -vYou have both fetch (download) and push (upload) access to your repository:
origin  https://github.com/username/mslearn-tailspin-spacegame-web.git (fetch)
origin https://github.com/username/mslearn-tailspin-spacegame-web.git (push)Origin specifies your repository on GitHub. When you fork code from another repository, it’s common to name the original remote (the one you forked from) upstream.
3. To create a remote named upstream that points to the Microsoft repository, run this git remote add command:
git remote add upstream https://github.com/MicrosoftDocs/mslearn-tailspin-spacegame-web.git4. Run git remote a second time to see the changes:
git remote -vYou see that you still have both fetch (download) and push (upload) access to your repository. You also now have fetch and push access to the Microsoft repository:
origin  https://github.com/username/mslearn-tailspin-spacegame-web.git (fetch)
origin  https://github.com/username/mslearn-tailspin-spacegame-web.git (push)
upstream https://github.com/MicrosoftDocs/mslearn-tailspin-spacegame-web.git (fetch)
upstream https://github.com/MicrosoftDocs/mslearn-tailspin-spacegame-web.git (push)Build and run the web app
- In the Visual Studio Code online editor, navigate to the terminal window, and to build the app, run this
dotnet buildcommand:
dotnet build --configuration Release2. From the terminal window, to run the app, run this dotnet run command:
dotnet run --configuration Release --no-build --project Tailspin.SpaceGame.Web.NET solution files can contain more than one project. The --project argument specifies the project for the Space Game web app.
Verify the application is running
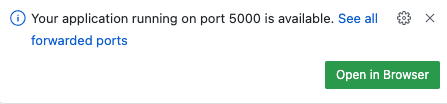
In development mode, the Space Game website is configured to run on port 5000.
You see a new message in the Visual Studio editor. Your application running on port 5000 is available. Select Open in Browser to go to the running app.
In the new browser window, you should see the Space Game web site:
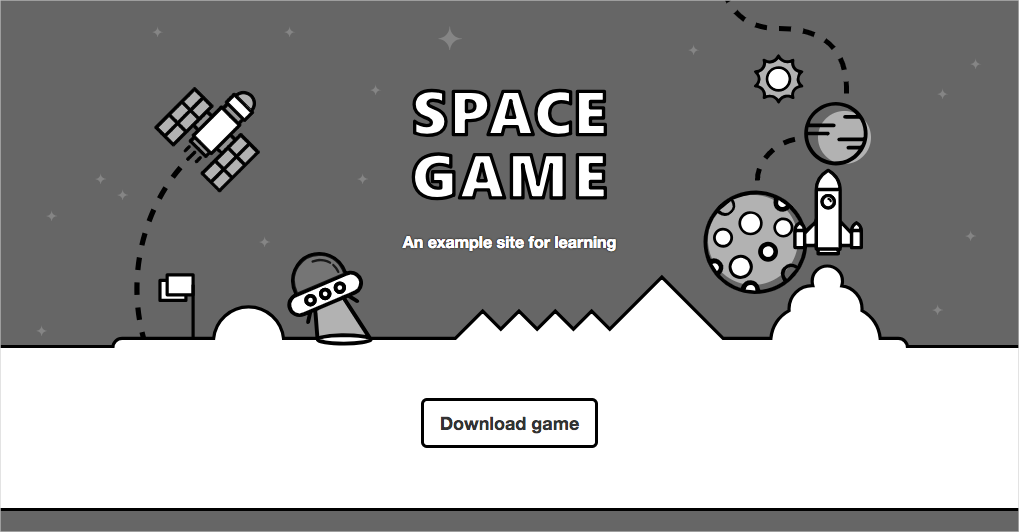
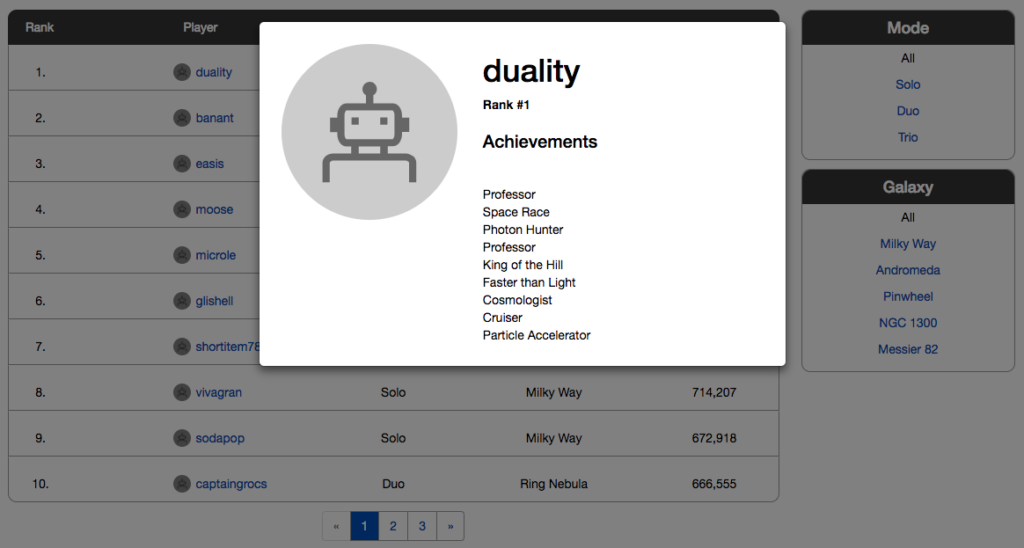
You can interact with the page, including the leaderboard. When you select a player’s name, you see details about that player:
When you’re finished, return to the terminal window, and to stop the running app, select Ctrl + C.
